Installing an exterior door is one of the best ways to enhance the appearance, security, and energy efficiency of your home. Whether you’re replacing an old, worn-out door or adding a new entrance to your property, installing an exterior door can be a manageable DIY project with the right knowledge and tools.
This guide will walk you through the entire process, step by step, from the tools and materials needed to the final adjustments.
Benefits of Installing a New Exterior Door
Before getting into the installation process, it’s important to understand the benefits of installing a new exterior door. A new door can:
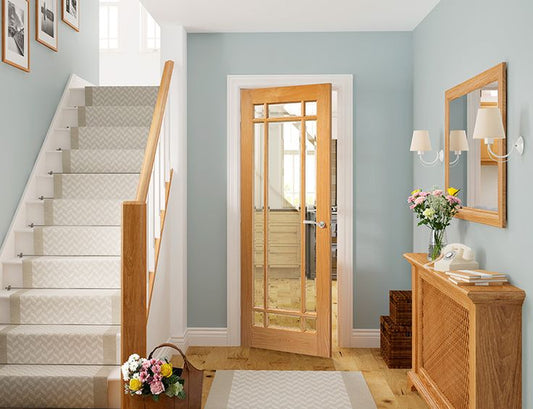
- Boost Curb Appeal: A new, well-chosen door can transform your home's first impression, increasing its visual appeal.
- Improve Energy Efficiency: Modern exterior doors are designed with energy efficiency in mind. They can help to reduce heat loss, which saves on heating and cooling costs.
- Enhance Security: New exterior doors are equipped with advanced locking systems, giving you peace of mind and greater protection against break-ins.
- Increase Property Value: Whether you’re planning to sell your home or just improve its overall value, installing a new exterior door can be a worthwhile investment.
Tools and Materials Needed
Before starting your exterior door installation, make sure you have all the necessary tools and materials. Below is a comprehensive list of what you’ll need:
Tools:
- Screwdriver or Drill: For driving screws into the door frame and hardware.
- Measuring Tape: To ensure precise measurements of the door frame and door itself.
- Level: To ensure the door is perfectly vertical and horizontal.
- Hammer: For securing shims and any other components.
- Pry Bar: Used to remove the old door frame.
- Circular Saw: If you need to trim the door or frame to fit.
- Caulk Gun: To apply caulk around the door frame to seal gaps.
- Utility Knife: For trimming insulation or excess materials.
Materials:
- New Exterior Door: Choose the door that fits both your aesthetic preferences and functional needs.
- Door Frame (if replacing): You may need to replace the frame if it's damaged or outdated.
- Wood Shims: Used to adjust the door frame and keep it level.
- Screws: To secure the door frame and door in place.
- Insulation: Used to fill any gaps between the door frame and wall.
- Door Hardware: This includes a handle, deadbolt, and any additional hardware for security.
Step-by-Step Guide: How to Install an Exterior Door
1. Remove the Old Door (If Applicable)
The first step in installing an exterior door is to remove the old door. This involves removing the existing door, frame, and any hardware. If your current door is hinged, use a screwdriver or drill to remove the hinge pins, and then carefully take the door off the frame. If you’re replacing the frame as well, use a pry bar to remove the frame from the wall.
Tip: Be cautious when removing the door, as old hardware may be difficult to remove, and the frame may have been secured with long nails.
2. Measure the Door Opening
Accurate measurements are key to installing a door that fits properly. Measure the width, height, and depth of the door frame. If you're replacing both the door and the frame, make sure to measure the overall opening carefully.
Tip: Measure the width at three points: top, middle, and bottom. This ensures the frame is square and level.
3. Prepare the New Door
If your new door is pre-hung (meaning it comes with a frame), you can skip the step of installing a new frame. However, if you need to trim the door to fit, measure and mark the desired height and width carefully, then use a circular saw to trim it. You should leave about a 1/8-inch gap at the bottom for expansion due to weather changes.
Tip: If you are trimming the door, make sure to sand the edges afterward to smooth out any rough areas.
4. Install the Door Frame (If Necessary)
If you’re also replacing the door frame, this is the time to install the new frame. Position the new frame in the door opening, ensuring it is level and square. Use wood shims to make minor adjustments to the frame so that it fits perfectly in the opening. Once the frame is aligned, secure it in place by driving screws through the frame and into the wall studs.
Tip: Ensure the frame is square at all corners. Use a level on both the sides and top of the frame to check its alignment.
5. Hang the Door
Once the frame is installed, it’s time to hang the door. Position the door in the frame and align the hinges. Using screws, secure the hinges to the door frame, making sure the door swings open and closed smoothly.
Tip: It’s helpful to have someone assist you when hanging the door, as it can be heavy and difficult to hold in place while securing the hinges.
6. Secure the Door
After the door is hung, it’s time to secure it in place. Use screws around the perimeter of the door frame to anchor it securely to the wall. Make sure the door fits snugly into the frame and opens and closes without difficulty.
Tip: Ensure the door is properly aligned by checking that the gap between the door and the frame is consistent all around.
7. Add Insulation and Seal Gaps
Insulation is essential to keep your door energy-efficient. Use foam insulation or weatherstripping around the door frame to seal any gaps between the wall and the door. This will help to reduce drafts and prevent heat loss.
Tip: Apply caulk around the edges of the door frame for an extra layer of protection against the elements.
8. Install Door Hardware
With the door securely in place, it’s time to install the door hardware. This typically includes the door handle, lock, and deadbolt. Follow the manufacturer's instructions for precise installation. Make sure the handle is at a comfortable height and that the lock functions smoothly.
Tip: Install a door sweep or weatherstrip at the bottom of the door to further reduce drafts and increase energy efficiency.
9. Final Adjustments
Once the door and hardware are installed, take the time to make any final adjustments. Check that the door swings smoothly, the lock works properly, and the frame is fully secured. If the door doesn’t close properly, use a screwdriver to adjust the hinges or shims until the door fits correctly.
Tip: Ensure the door doesn’t drag along the floor and is perfectly aligned with the frame.
Things to Keep in Mind When Installing an Exterior Door
- Safety First: Always wear safety gloves, goggles, and other protective gear while working with tools.
- Check the Weather: Avoid installing a door on a rainy or windy day to prevent weather interference.
- Measure Twice, Cut Once: Accurate measurements are key to ensuring your new door fits perfectly.
- Level the Frame: Make sure the door frame is level and square before securing it in place to avoid door alignment issues later.
- Weatherproofing: Be sure to seal any gaps around the door with caulk or weatherstripping to prevent drafts.
Conclusion
Installing an exterior door is a rewarding home improvement project that can make a significant impact on your home's appearance, security, and energy efficiency. By following these steps and using the right tools and materials, you can install a new door successfully and enjoy its benefits for years to come. If you’re ready to upgrade your home, visit Deal4Doors' Exterior Doors Collection to explore a wide selection of exterior doors that suit your style and needs.